Showing posts with label Crafting Corner. Show all posts

Wednesday, 31 October 2018

Crafting Corner: Happy Halloween!

Happy Halloween everyone! I hope you're all having a fun filled day with lots of treats and fun costumes. One of my favourite things about Halloween (apart from dressing up which I've not had an excuse to do for years LOL) is carving pumpkins. We missed doing them last year due to various family holidays and illnesses but I got to doubly make up for that this year by doing it twice, once with my Mum and again with my brother and his family. Mum and I even went to a local farm a couple of weeks ago and picked our own pumpkins which is something we'd never done before!

Pumpkin picking!

The pumpkins Mum and I carved

My pumpkins: Oogie Boogie from A Nightmare Before Christmas, 
a cannibal pumpkin and Grumpy Cat!

Family fun

My little helper
(not allowed anywhere near knives but pretty good with a spoon LOL)

Of course I had to buy my nephew a Halloween book!

Me, Aidan, Swopan, Subasana & James

Even more pumpkins LOL

Did you spot my minion in the crowd? 
My Dad always ends up being the one taking all the pics so he's not in any of the group shots

So that was our Halloween fun for the year, Aidan isn't quite old enough for Trick or Treating yet but hopefully next year will involve dressing up for all of us LOL.

Tuesday, 20 February 2018

Product Review: Metal Earth: Harry Potter Gringotts Dragon (3D Puzzle)

From steel sheets to museum quality 3D models. Simply pop out the pieces and connect using tabs and holes. No glue or solder needed! Parts can be easily clipped from the metal sheets, tweezers make an ideal tool for bending or twisting the connection tabs. Packaging contains: 2 metal sheets and illustrated instructions

GRINGOTT'S DRAGON
GRINGOTT'S DRAGON: Also known as the Ukrainian Ironbelly species. Gringott's Dragon is used to guard several high-security vaults, including the Lestrange Vault, at Gringotts Wizarding Bank.
Item#:MMS443
Number Of Sheets: 2 Sheets
Difficulty: Moderate
Assembled Size: 7.48" x 5.39" x 2.36"

Visit the Metal Earth website for more information

Harry Potter Series:
Harry Potter and the Philosopher's Stone
Harry Potter and the Philosopher's Stone: Illustrated Edition (Illustrated by Jim Kay)
Harry Potter and the Philosopher's Stone: 20th Anniversary House Editions
Harry Potter and the Chamber of Secrets
Harry Potter and the Chamber of Secrets: Illustrated Edition (Illustrated by Jim Kay)
Harry Potter and the Prisoner of Azkaban
Harry Potter and the Prisoner of Azkaban: Illustrated Edition (Illustrated by Jim Kay)
Harry Potter and the Goblet of Fire
Harry Potter and the Goblet of Fire: Illustrated Edition (Illustrated by Jim Kay)
Harry Potter and the Order of the Phoenix
Harry Potter and the Half-Blood Prince
Harry Potter and the Deathly Hallows
Harry Potter and the Cursed Child (Play Script written with John Tiffany & Jack Thorne)

Pottermore Presents:
Short Stories from Hogwarts of Heroism, Hardship and Dangerous Hobbies (Short Story Collection)
Short Stories from Hogwarts of Power, Politics and Pesky Poltergeists (Short Story Collection)
Hogwarts: An Incomplete and Unreliable Guide (Short Story Collection)

Incredibuilds:
IncrediBuilds: Fantastic Beasts and Where to Find Them: Erumpent (Deluxe Book and Model Set)
IncrediBuilds: Fantastic Beasts and Where to Find Them: Niffler (Deluxe Book and Model Set)
IncrediBuilds: Fantastic Beasts and Where to Find Them: Swooping Evil (Deluxe Book and Model Set)
IncrediBuilds: Fantastic Beasts and Where to Find Them: Thunderbird (Deluxe Book and Model Set)
IncrediBuilds: Harry Potter: Aragog (Deluxe Book and Model Set)
Incredibuilds: Harry Potter: Buckbeak (Deluxe Book and Model Set)
IncrediBuilds: Harry Potter: Hedwig (Deluxe Book and Model Set)
Incredibuilds: Harry Potter: Hogwarts Express (Deluxe Book and Model Set)
Incredibuilds: Harry Potter: House-Elves (Deluxe Book and Model Set)
Incredibuilds: Harry Potter: Quidditch (Deluxe Book and Model Set)
IncrediBuilds: Harry Potter: Sorting Hat (Deluxe Book and Model Set)
IncrediBuilds: Harry Potter: Stag Patronus (Deluxe Book and Model Set)
Incredibuilds: Harry Potter: Thestral (Deluxe Book and Model Set)

Other Harry Potter Books & Products:
Funko Pop 2019 Harry Potter Advent Calendar
Harry Potter: A Pop-Up Guide to Hogwarts - Matthew Reinhart
Harry Potter - Creatures: A Paper Scene Book
Harry Potter Hedwig Owl Kit and Sticker Book (Model & Sticker Book)
Harry Potter: Magical Film Projections: Patronus Charm (Activity Book)
Harry Potter Talking Sorting Hat and Sticker Book: Which House Are You? (Model & Sticker Book)
Harry Potter: The Character Vault - Jody Revenson
Harry Potter: The Marauder's Map Guide to Hogwarts - Erinn Pascal (Activity Book)
Harry Potter: Winter at Hogwarts: A Magical Colouring Set (Colouring Book, Gift Tags & a build your own 3D Firebolt in a Keepsake Box)
J.K. Rowling's Wizarding World: Magical Film Projections: Creatures (Activity Book)
Metal Earth: Harry Potter Gringotts Dragon (3D Puzzle)
Warner Bros. Studio Tour London - The Making of Harry Potter: The Official Guide

Visit J.K. Rowling's website or the Pottermore website for more information

Review:
I've never made a model like this before but I'm a huge HP fan and I collect dragons so I couldn't resist this kit! The kit contains 2 sheets of metal with all the pieces you'll need to make the model, and a full instruction sheet. It recommends using proper tools like needle nose pliers and clippers to help remove the pieces from the metal sheets they come in but to be honest I didn't want to pay out the extra money when I wasn't sure the tools would be used again in the future.


It could possibly have made my life easier if I'd had the correct tools but I managed to build this kit using a couple of pairs of tweezers and a sharp crafting blade to cut the metal (please be very, VERY careful if you do the same thing as it would be incredibly easy to slice your finger open!). To be honest you need to be a little careful anyway because the tiny pieces of metal do have quite sharp edges and my fingers ended up with loads of tiny little cuts from building this dragon. I also used a variety of sized pens, pencils and even a metal kebab stick to bend the metal around to get the curved edges I needed.


Like I said I've never made anything like this before so I had no idea where to start but the instructions were clear and easy to follow. It was quite fiddly at first but once I'd got used to how to bend the metal it got much easier and, apart from the legs (I never did manage to get all the tabs in place for the knee joints!), I found it fairly easy to work out how to slot everything together.


It was great to see the dragon slowly come to life as I built it and I'm really pleased with the finished results too, the dragon looks great on my Harry Potter shelf!


Source: Purchased

Other reviews of this book:
If you have reviewed this book on your blog please leave a link to your review in the comments & I'll add the link here.

Saturday, 10 February 2018

Crafting Corner: Book Folding Art inspired by Jay Kristoff's Nevernight Chronicles


I've been folding books again so look away now if you're squeamish! To be fair, the books I fold are still totally readable, no permanent damage has been done, you'd just have to unfold the pages which might take a while LOL.

Anyway, as a HUGE fan of Jay Kristoff's Nevernight Chronicles I wanted to make a book fold for the series (I actually made this one a few months ago now but I never got around to posting about it). This design is inspired by the UK cover for Nevernight and I think it turned out a pretty good representation!


I wish it wasn't quite so hard to get good pictures of book folding art, it's nearly impossible to show the entire design in good light in a single photo but trust me they look fantastic when you see them in the flesh!


And here it is with my copies of Nevernight and Godsgrave. Who else loves this series as much as I do? I can't wait for the third book to come out later this year!

Thursday, 10 August 2017

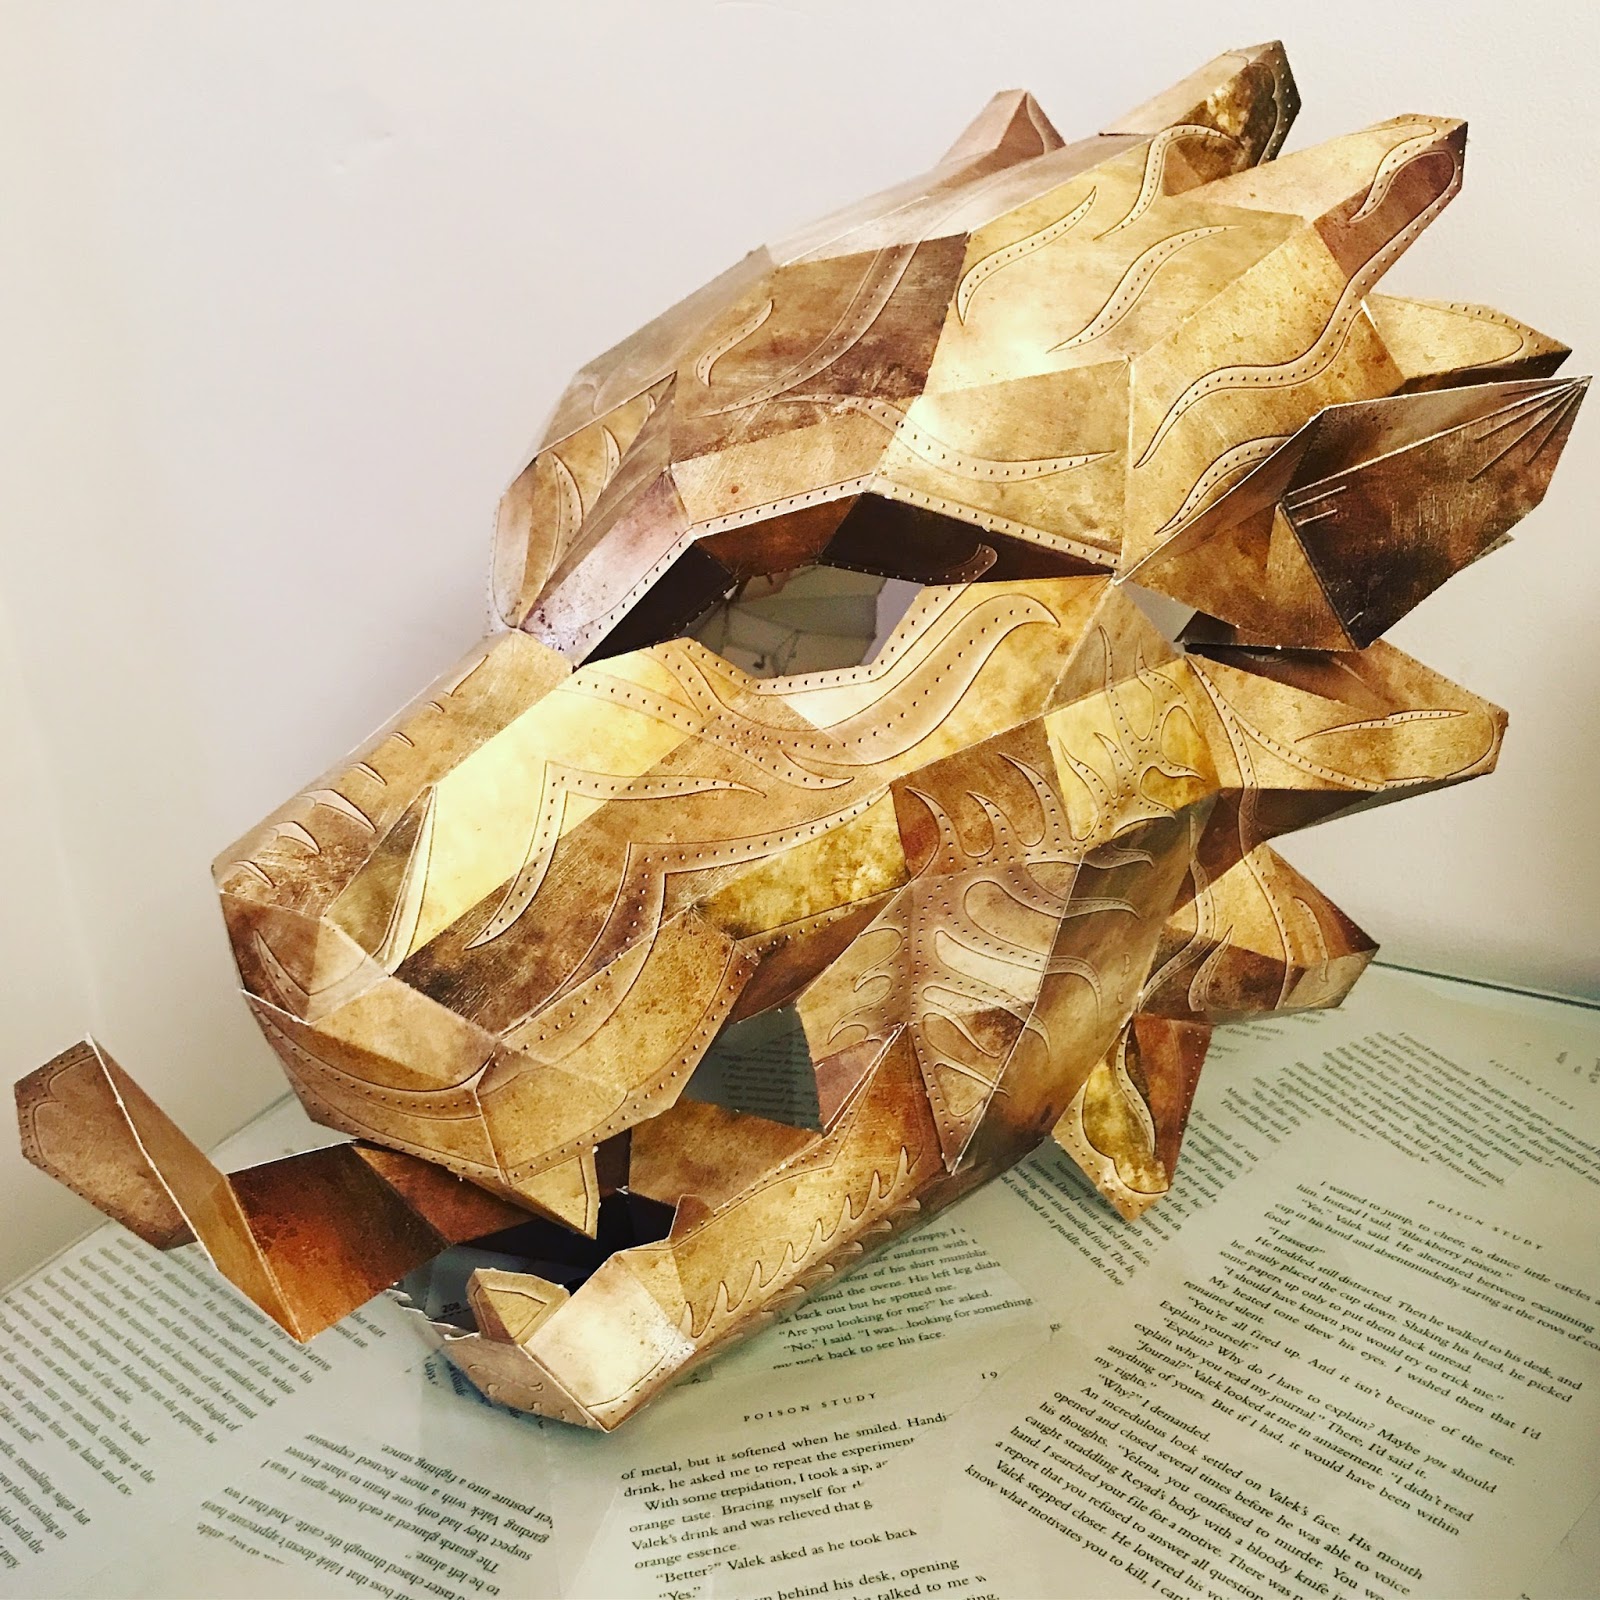
Review: Game of Thrones Mask: The House Lannister Lion - Steve Wintercroft

Honour the noble houses of Westeros, and warn others of the coming winter with the official Game of Thrones 3D Mask & Wall Mount series. Using Wintercroft's fantastic 3D poly-style mask designs, take these iconic house sigils and create easy-to-make masks to either wear, or mount on your wall as trophies. They say a Lannister always pays their debts - show you do the same with this fantastic mount, perfect for any Game of Thrones fan's home.

Game of Thrones Masks Series:
The House Lannister Lion
The House Stark Direwolf
The House Targaryen Dragon (September 2017)
White Walker (September 2017)

Visit Steve Wintercroft's website for more information

Review:
I have to admit I've never made anything like this before but I love trying out different crafty projects so as soon as I saw these Game of Thrones masks I wanted to try them. This book includes all the pieces you'll need to make a Lannister Lion Mask as well as a wall mount that the mask will sit on when not in use (so it'll look like you have a lion's head hanging on your wall!). The only things you'll need to make the mask is glue (I used a pritt-stick) or double sided celotape and for the wall mount you'll also need a pair of scissors. The book comes with very clear instructions that you should read carefully before getting started.

It recommends starting by making the mast and the first thing you'll need to do is carefully pop out the 26 pieces needed to make it. The pieces are marked A to Z and you use them in alphabetical order (be careful because the lettering is the same for the pieces to make the wall mount but they have different symbols on them so you need to make sure you have the right pieces!). Start with piece A and make all of the required folds (there are instructions in the book to help you know what types of folds are needed - valley or mountain). Then you'll see lots of small numbers on the inside of the piece and you basically need to join the matching numbers together using the tabs on one side. The best thing to do is to hold the piece in shape until you know exactly how it's supposed to fit together, this can be a little fiddly but once you have it figured out gluing it in place is very straightforward.


Once you've connected all the parts from piece A you can fold part B and glue them together, gradually add each letter until the mask is complete. It takes time to complete the project, especially if you've not done anything like this before, but I managed it easily on my own so as long as you're careful you shouldn't have any problems. The important thing is to make sure all the tabs are fully glued in place before you move on to adding the next piece or you'll end up finding it starts to fall apart later (I'm talking from experience there!).

The completed mask looks absolutely incredible and I'm thrilled with it. There is a strap that has to be adjusted to your personal requirement so the mask will only fit one person but once you have it lined up it's really comfortable to wear and would look great for Halloween or a fancy dress party.


The second part of the project is making the wall mount for the mask to stand on and I have to admit I found that part more fiddly than making the actual mask! It has slightly less pieces (I think it was 18 rather than 26) but they fit together to form a ring and I found it awkward trying to attach both sides together at the end but again with a bit of patience I was able to do it without any help. Once you've connected the pieces you have to attach them to the baseboard (included at the back of the book) and again I found it hard to get the ring into the exact shape I wanted. In the end I found the easiest option was to hold the mount in place using bulldog clips and then once I had the whole thing where it needed to be I was able to tape it in place.


The wall mount on its own doesn't look particularly impressive but by the time you add on the mask it makes a brilliant piece of wall art! I had so much fun making this and I love the results so I definitely think I need to collect the rest of the set.


The Game of Thrones official 3D mask and wall mount books, published by Carlton Books, will be available at all leading book retailers and www.carltonbooks.co.uk at a price of £14.99. The Stark Direwolf and Lannister Lion books will be available from 10th August, with the Targaryen Dragon and White Walker books will be available from 7th September.

Source: Received from Carlton Books in exchange for an honest review

Other reviews of this book:
If you have reviewed this book on your blog please leave a link to your review in the comments & I'll add the link here.

Monday, 22 May 2017

Crafting Corner: Book Folding Art inspired by Patricia Briggs' Mercy Thompson Series (2nd Design)


You may remember I've already done a book fold inspired by Patricia Briggs' Mercy Thompson series of a wolf howling at the moon to represent the werewolves of the series and Adam in particular but I wanted to make a present for a friend who is also a huge fan of the series and I didn't want to use a design that she's seen before. I also thought that since Mercy is the main character of the series it's only fair that she gets a book fold to represent her.

For anyone unfamiliar with the series Mercy is a coyote shifter and she has a tattoo of a coyote paw print so that seemed like the obvious choice for a pattern and I absolutely love the way it turned out.


I love them even more when I see the two designs next to each other though! The paw print has been given away now but I'm definitely going to make another one for my own bookcase.


What do you think? Any other Mercy Thompson series fans out there? Any suggestions for what I should make next? I would really LOVE to make a book fold for Ilona Andrews' Kate Daniels series, the obvious choice would be a lion to represent Curran but I can't seem to find a really good lion silhouette thats suitable for making a pattern with. I need something that has fairly simple bold lines and is easily recognisable without having too much detail but so far I'm coming up blank.

Sunday, 21 May 2017

Review: Art Life - Bev Speight

Art Life is an invitation to take a creative journey - making your own fantastic art along the way. This is a completely original way to unleash your creativity, with an engaging structure based around four distinct categories for exploring ideas - line, book, traces, and marks. For each of these there are numerous projects and accessible methods for creating art, and you are encouraged to try whatever inspires you, without pressure or any preconceptions. Enjoy the element of surprise and satisfaction in creating something that evolves, rather than following a rigid plan. You will be amazed by what you can achieve.

Introducing work in every conceivable medium with sensational art and new photos, this book will let you enjoy the creative process, relax, and enjoy the art escape.

Visit the Bev Speight's website for more information

Review:
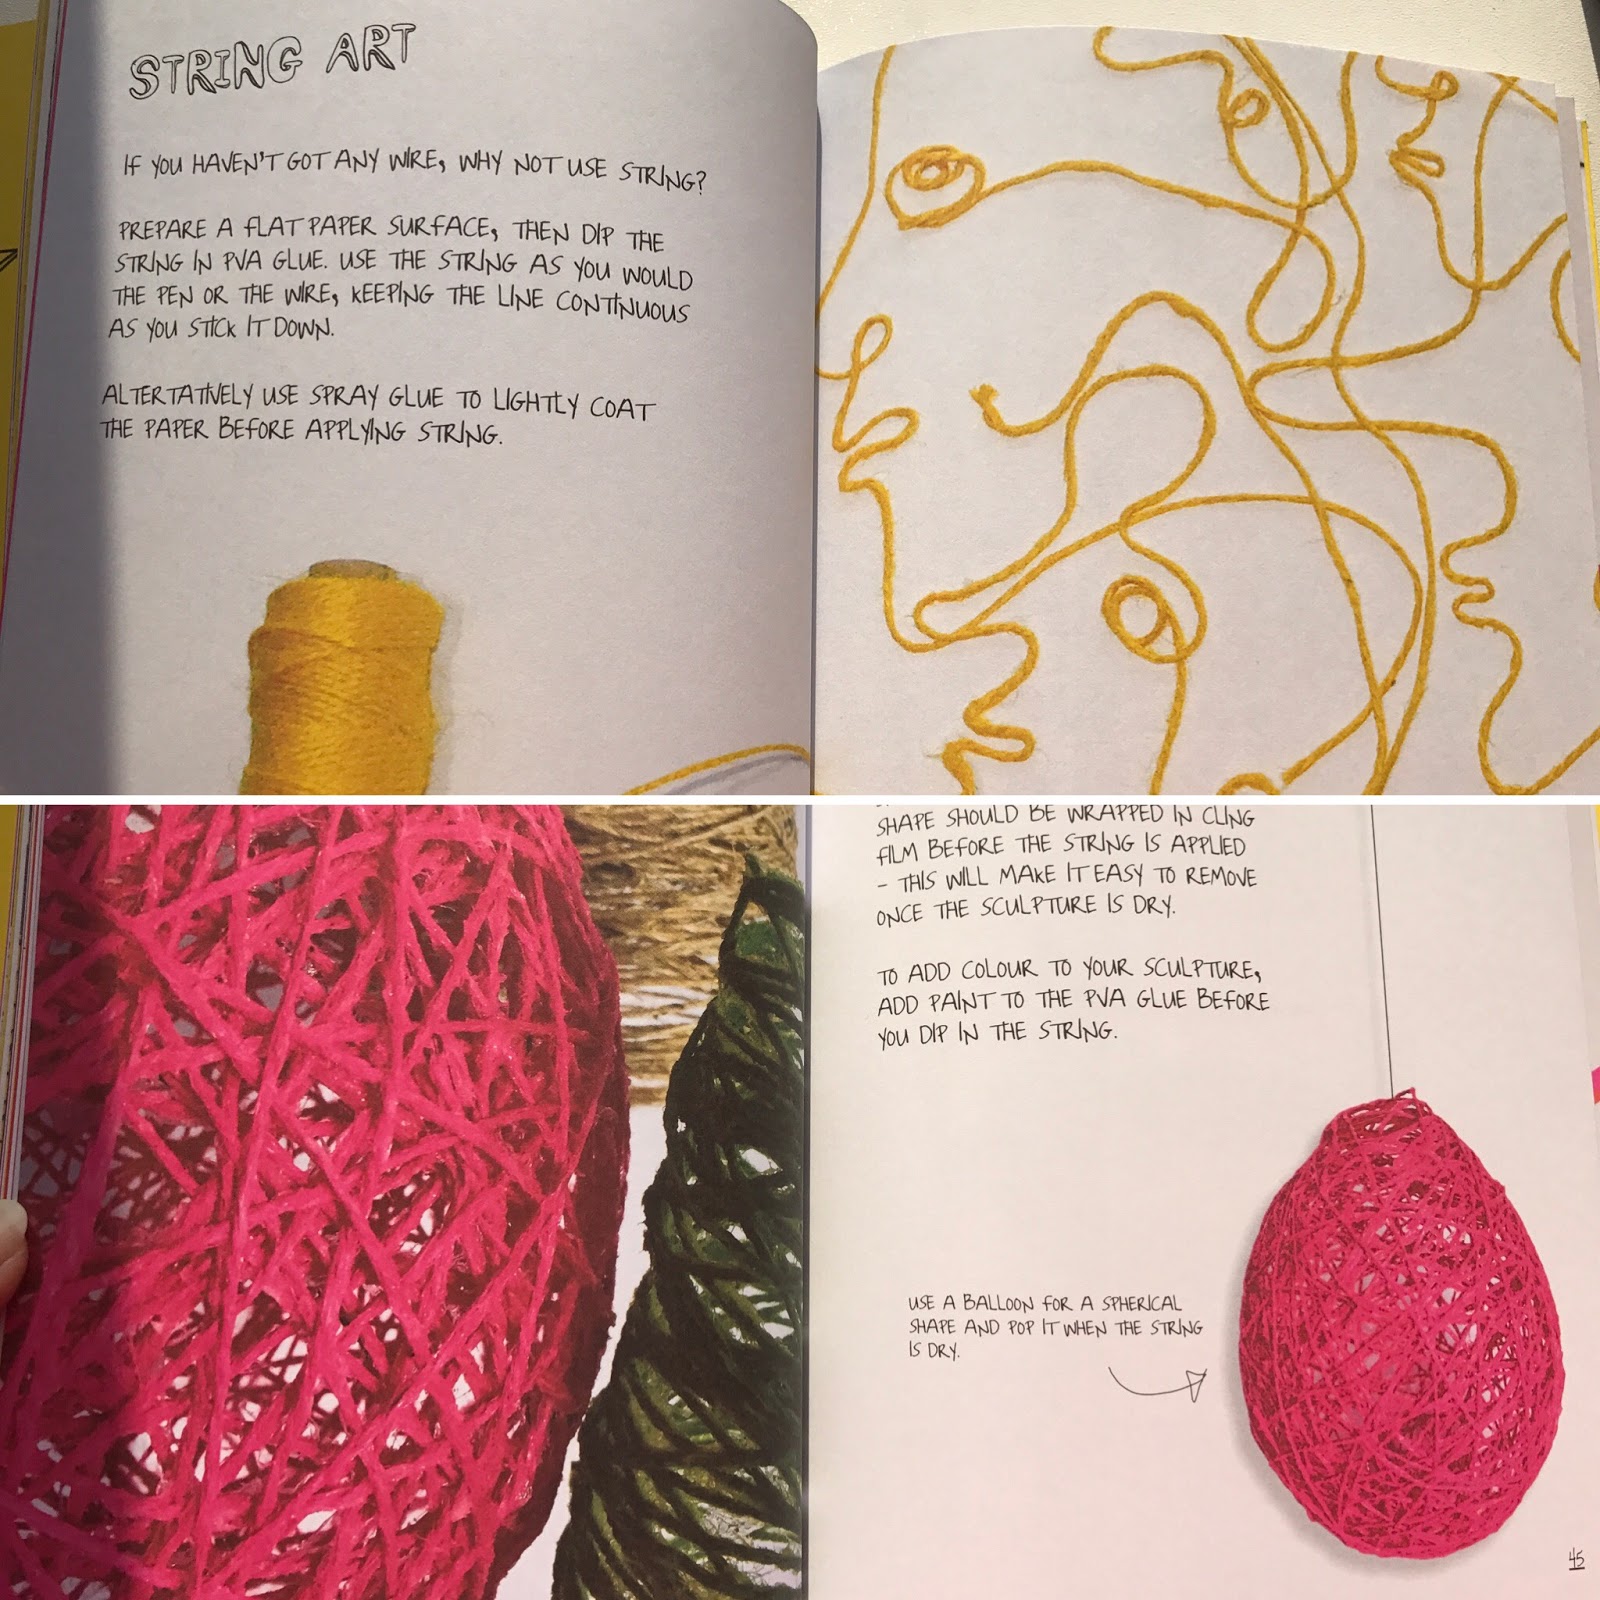
Art Life isn't an instruction manual and it doesn't give you in depth instructions on how to complete different art projects. Instead what it aims to do is inspire you to try out new techniques and experiment with art in a way you might never have tried before. You don't need to be a professional artist to take inspiration from this book, Bev Speight has focused on ideas that can be achieved fairly easily and in most cases using items you probably already have in your home and garden. You won't need to buy a huge amount of expensive equipment to get started but I think flicking through the pages will leave you eager to get experimenting.

The book is split into 4 different journeys, the first is Line which focuses on taking inspiration from your surroundings, making drawings from one continuous line which you could the go on to recreate using wire or string and things like creating geometric designs using different coloured tape.


Journey two is Book and this was probably my favourite section of all because it focuses on creating art out of old books which is something I already love doing. There are just so many ways you can cut or fold book pages to create sculptures and I'm definitely looking forward to experimenting more using ideas I've seen in this book.


Journey Three is called Traces and it's all about leaving your mark, be that in paint with homemade brushes using bits of twig or feathers or by creating your own blocks to use as prints, you could even experiment with ink or coffee or wine rather than paint. This section is all about texture and thinking outside the box, give yourself the freedom to experiment and remember that you don't always have to use normal paint brushes when fingers or toes or the sole of an old shoe might work even better.


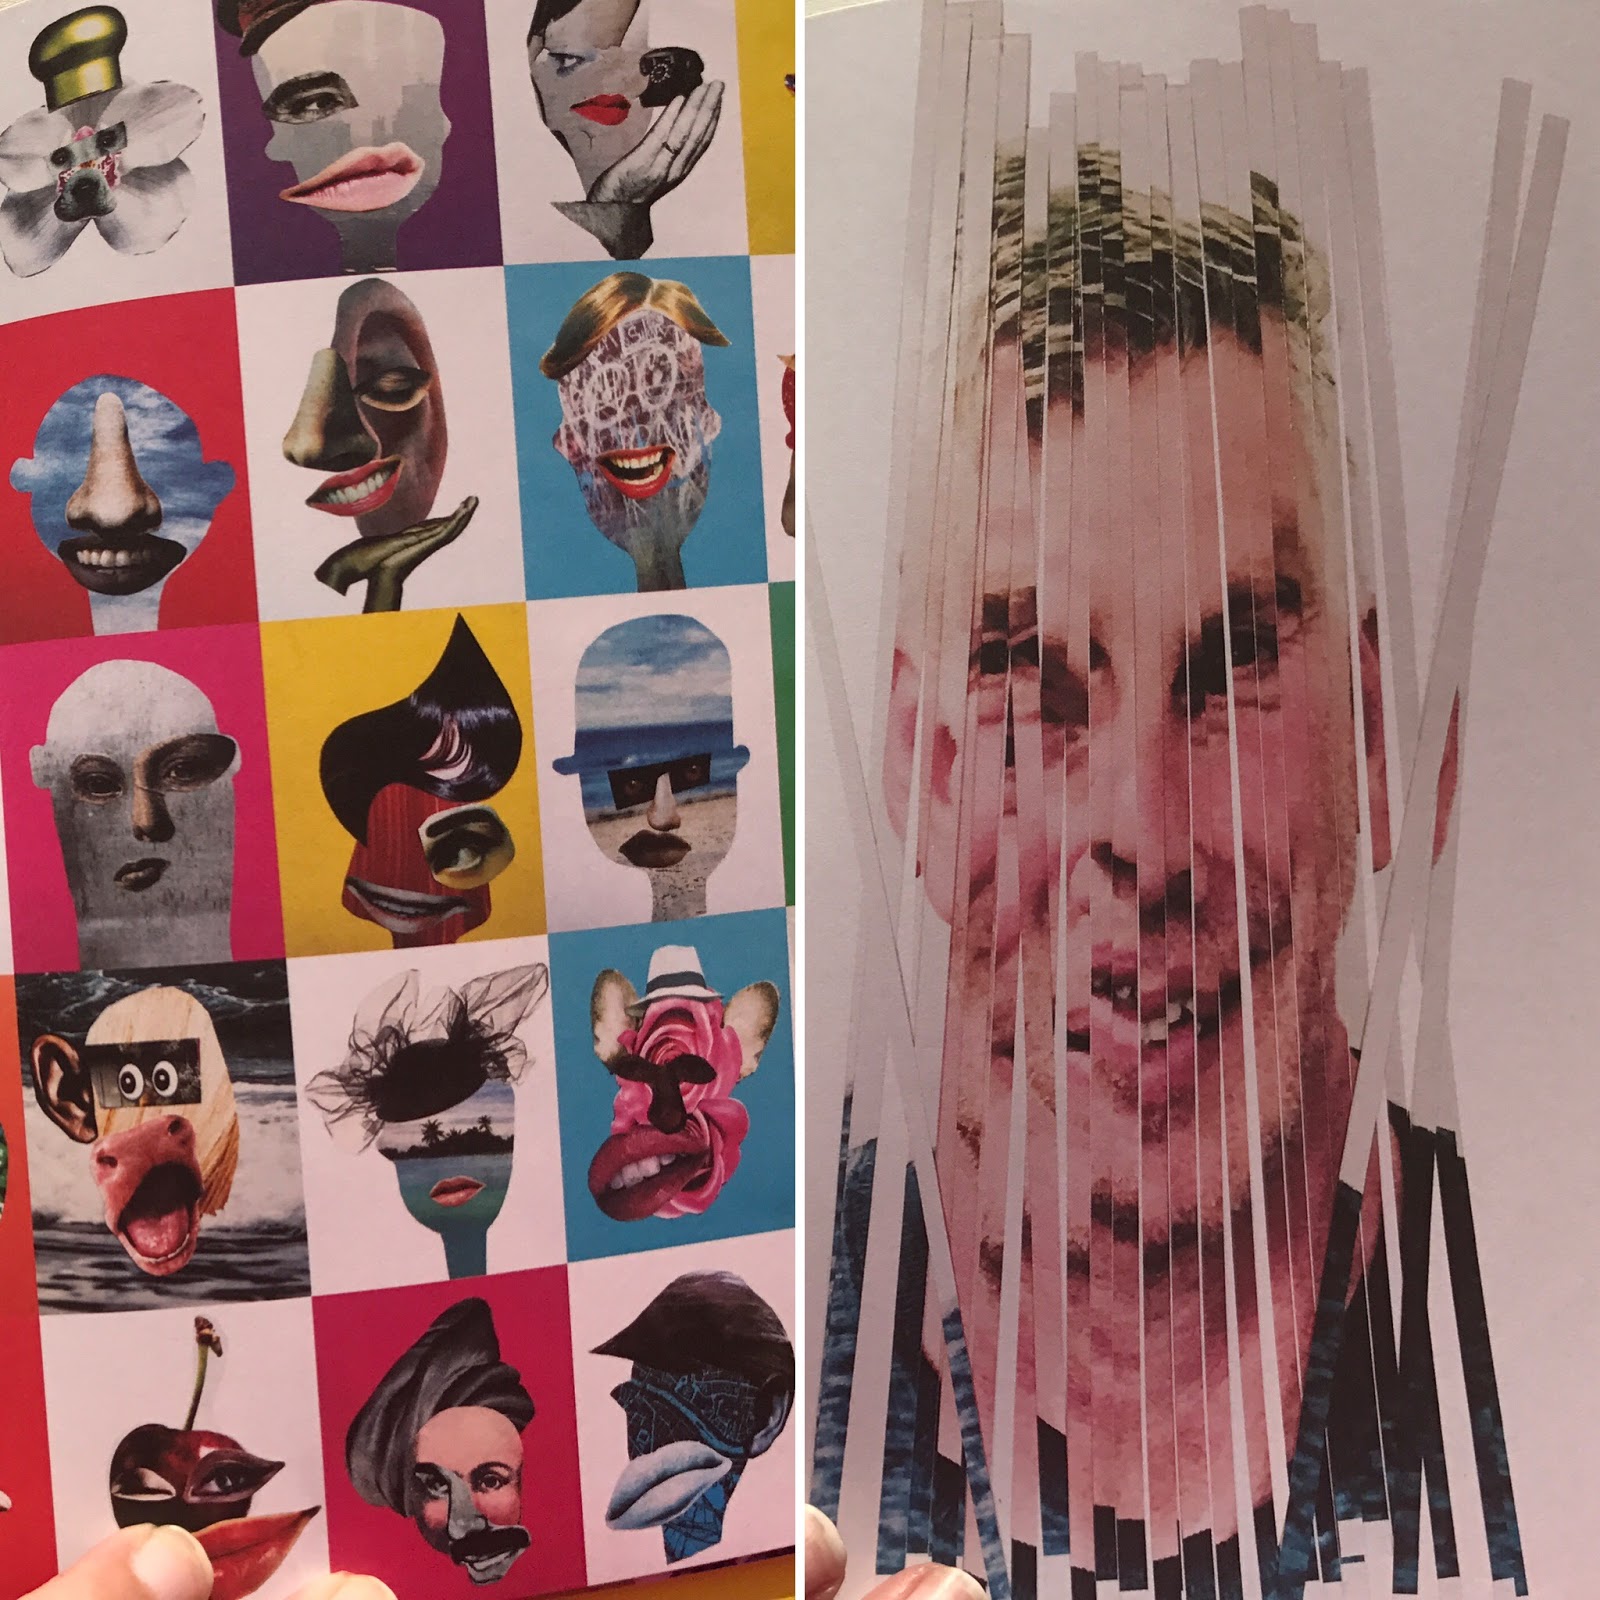
The final journey is Paper which focuses on making collages and experimenting with different types of paper. Cut out facial features from magazines and mix them up in unusual ways or take a single image, cut it into strips and rearrange the pieces to distort the picture. Play around with different shapes and colours and just see what you can come up with.


If the author's goal is to inspire people to go out and try new things then I'd say she's achieved that 100%. Flicking through this book gave me so many ideas and there are things I'd never have thought about trying otherwise. I can't wait to get started!

Source: Received from Amazon Vine in exchange for an honest review

Other Reviews:
If you have reviewed this book on your blog please leave a link to your review in the comments & I'll add the link here.

Paperback / Kindle:

Sunday, 15 January 2017

Crafting Corner: Book Folding Art inspired by Patricia Briggs' Mercy Thompson Series


I absolutely love Patricia Briggs' writing, her Mercy Thompson series (and the Alpha & Omega books set in the same world) is one of my favourite urban fantasy series and I tend to reread it most years to get ready for the latest release. Since I have a section of my bookshelves dedicated to this series I thought it would be fun to make a book fold to add.

I decided I wanted to do a wolf howling at the moon (yes I get that Mercy is a Coyote but the majority of characters in the series are werewolves and the first book in the series is Moon Called!).

I found this image online and decided to use it as inspiration for my book fold:


It's a little harder to see the details on a book fold but I'm pretty pleased with the way it turned out:


What do you think? I really like it but I think I might have to try and come up with a design with a Coyote paw print to match Mercy's tattoo next LOL.

Monday, 19 December 2016

Crafting Corner: Book Folding Art inspired by Leigh Bardugo's Six of Crows Duology


I absolutely love Six of Crows, in fact I'm a huge fan of all of Leigh Bardugo's books, so it made sense to combine my love of her writing with my love of Book Folding and create something to display on my overflowing Leigh Bardugo book shelf.

The obvious idea was to recreate the official Dregs tattoo which is described in the book as "a crow trying to drink from a near empty goblet". I found a picture online of the temporary tattoo created as a preorder promotion for the series (see below left), it's a gorgeous tattoo but the image is far too complex to turn into a book fold so I had to come up with my own, more simple, version of the design (below right).


I know it's not quite the same but you can't put too much detail into a book fold or it won't work, you need a fairly straightforward silhouette to work from and I'm thrilled with the finished results. This is the first book fold I've made using a book with coloured edges to the page and the black really helps the design pop.


As much as I love the finished book fold it's actually been the hardest one to get a photo of but I think that gives you a good idea.


I think it's the perfect addition to my Leigh Bardugo bookshelf!

Monday, 5 December 2016

Crafting Corner Tutorial: How to make a bookish Christmas Wreath


After last year's success making a bookish Christmas Tree I decided I wanted to carry on the tradition and come up with a new book related Christmas craft to try out this year. After some google searching I decided to make my first ever Christmas Wreath. There are loads of different wreath designs out there but I fell in love with one I found on the blog What Katy Did and Kid so decided to follow Katy's tutorial.

So let's have a quick look at my finished wreath and then I'll give you step-by-step instructions on how to make your own!

I'm so thrilled with how this wreath turned out!

Now let's have a look at what you'll need to make your own:


  • Polystyrene wreath ring - I bought a pack of 5 quite cheaply from Amazon here but you can probably find something similar in your local craft shop. The size is up to you but I used a 30cm one.
  • An old paperback book - sorry fellow bookworms but the book will be destroyed in the process of making this so pick an old one and preferably one that's already falling apart LOL.
  • Glue Gun & spare glue sticks - I used about 2.5 sticks to make my wreath, you could probably get away with less but this was my first time using a glue gun so I was a bit overzealous
  • Scissors
  • Pencil
  • Ribbon or other items to decorate - You really can add whatever you like when it's finished, I used a red ribbon but I might try making another one with pine cones or Christmas tree baubles later
Once you've gathered your supplies it's time to get started


  1. Take a page from your book
  2. Fold it in half from top to bottom
  3. Then fold it in half again so you end up with a long thin strip that's made up of four layers
  4. Draw a leaf shape on the top page (you could create a template but I ended up just cutting the shapes out freehand, I think it looks nicer if the leaves aren't all a uniform shape).
  5. Cut out the leaf shape (cutting through the whole folded piece of paper)
  6. You'll end up getting 4 leaves from each piece of paper
  7. Fold each leaf in half so they'll give a more 3D shape when you stick them to your wreath

You'll need to repeat steps 1-7 a few times until you have enough leaves to start sticking them to the wreath. I started off by making 40 leaves (using 10 pages from my book) but in the end it took me 120 leaves (30 pages) to finish the wreath. It's up to you if you want to make all the leaves to start or just cut out more as you go along but I found it much easier to have a bunch ready before I got the glue gun heated up.


At this point it's just a case of starting to stick your leaves down, if you're anything like me you'll probably end up getting glue everywhere so make sure you put something down to protect whatever surface you're working on!

I started by placing a row of dots across my wreath and sticking 6 leaves in place. From there you just slowly add more leaves as you work your way around the wreath making sure all the leaves point in the same direction. The leaves don't have to be touching but try to make sure that you don't leave any holes that you can see the polystyrene through. The idea is to layer the leaves so that they overlap slightly and don't leave any gaps in the finished design.

You can use the end of your pencil to help you push the leaves into place and that will definitely make things easier when you reach the end of your wreath and are trying to push leaves in underneath your original starting point to close the circle.


It takes time for the wreath to start to come together but it's worth the effort when you see the finished product! As you can see I decorated mine with a red bow made from ribbon which I just glued in place using the glue gun but your decorating options are unlimited so let your imagination run wild.

I also glued a smaller length of ribbon to the back to make a loop so the wreath can be hung from a door or picture hook.

I'll update this post when I try out different designs but in the meantime if you make a wreath of your own I'd love to see it so please leave me a link in the comments if you blog about it!


As I only used about 30 pages of my book to make this I have plenty left to create more wreaths or try another bookish craft. If you want to try making the Christmas tree I made last year you can find my instructions here. You'll need around 200 pages still stuck together to create a tree and you'll end up with something that looks a lot like this:


So what do you think of my Christmas Wreath? Have you made anything similar? If you have any other bookish crafting ideas I'd love to see them, I'm always looking for new craft projects to try!

Update 9th December:

So it seems like I've become a little addicted to making Christmas Wreaths because I've made two more since I first posted this!

This wreath was made in exactly the same way as the previous one except I cut out holly shaped leaves instead of oval ones and I used Christmas tree baubles to add berries. The shape of the leaves did mean it took more to cover the wreath, I lost count in the end but I think I made around 180 leaves (so used roughly 45 pages from a book).


I wasn't planning on making any more after the holly wreath but then I had a bit of a lightbulb moment and knew I just had to make a Rudolph version. I just couldn't stop thinking about it until it was done and I'm rather happy with the results. I used the original style leaves for this one (just because it took less leaves to create) and then I drew the eyes and antlers on an old Amazon delivery box. The red nose is a Christmas parcel topper I found in Paperchase and the mini Santa hat is one I bought for my cats from a pet shop a few years ago. All the decorations are glued in place apart from the Santa hat which I attached using dressmaking pins so that I can remove it to reuse later if I need to. So here is the finished result:


What do you think? Which is your favourite of the three wreaths? If you make one and come up with your own ideas for decorations I'd love to see them so please leave me a link in the comments!

LinkWithin

Related Posts with Thumbnails